Your VPS has a hostname: the name it shows in the portal and in logs, and the one you probably want on your prompt and in your mail headers. You can change the portal's copy in about ten seconds. The name inside the operating system is a separate setting, so this article covers both.
What is a hostname?
A hostname is the name your server calls itself, such as web1.example.com. It shows up in your shell prompt, in system logs, in the headers of email your server sends, and in the portal. It is just a label. It doesn't create any DNS records by itself, and nothing on the internet will find your server by that name until you add an A record for it at your DNS provider.
Two places, two settings
- The portal hostname is what you see on the Overview tab of your VPS. Changing it here updates the name the portal shows.
- The operating system hostname is what the server itself reports (
hostname, your shell prompt, mail headers). It lives inside the VPS, so you set it with a command after you log in.
Set both to the same name so nobody has to wonder which one is right.
Steps
- Pick a fully qualified name you control, like
web1.example.com. Letters, numbers and hyphens only, no spaces. - The portal can take up to a minute to save the new name, and the Edit link is only there while the VPS is idle.
- If this IP sends email, the hostname should match the reverse DNS (PTR) record. See the related article below.
Change the portal hostname
- Log in to the portal at https://noc.versaweb.com.
- Click Services, then Smart VPS Servers, then click your VPS.
- On the Overview tab, find the Hostname row and click Edit.
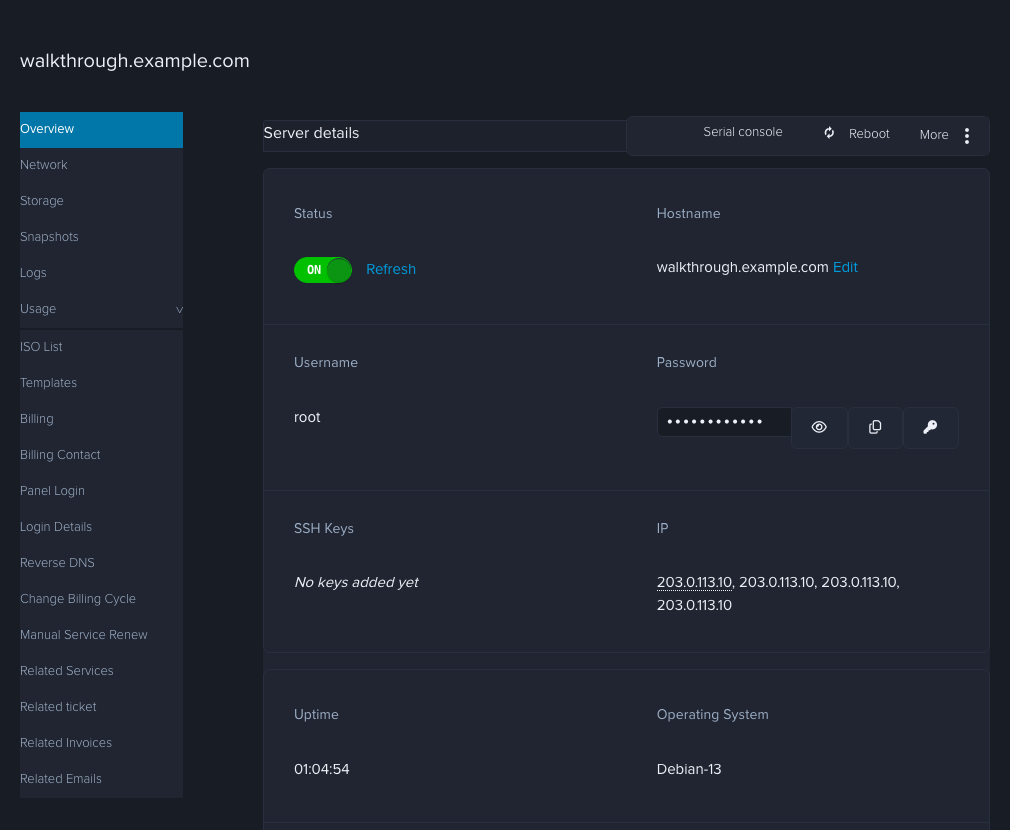
- Type the new hostname into the box that appears.
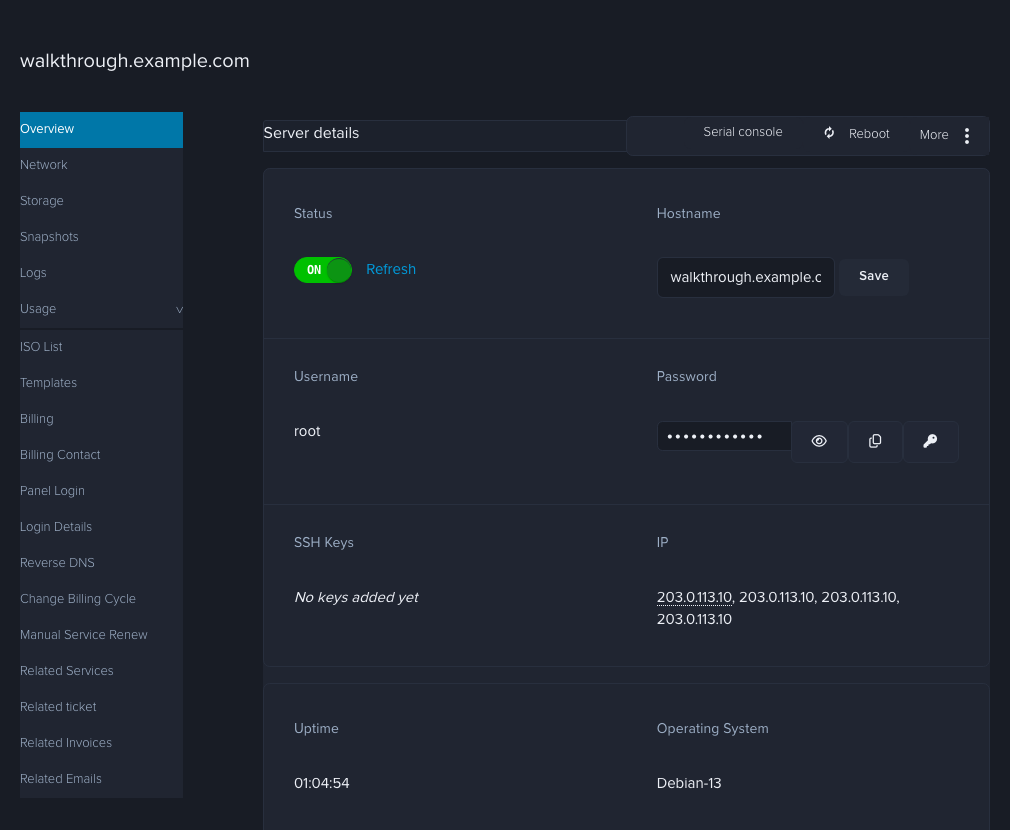
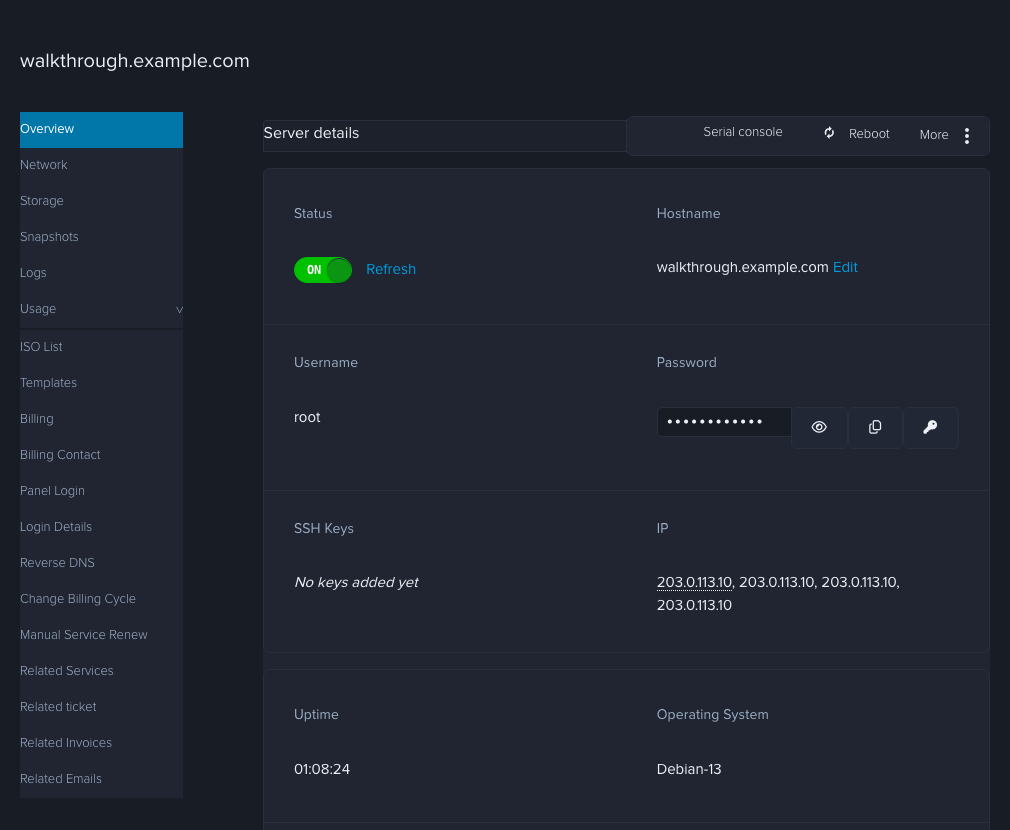
- Click Save. The row says it's updating for up to a minute. Reload the page to see the new name.
Change the hostname inside the operating system
Log in over SSH (or the console) as root and run the following. Replace web1.example.com with your name.
- Set the name:
hostnamectl set-hostname web1.example.com - Open
/etc/hosts(for examplenano /etc/hosts) and make sure the line for your server lists the new name. On Debian that is usually the second line, the one the image added for the server's own name. It should end with your new name and its short form, for exampleweb1.example.com web1. The image manages this file with cloud-init, so the change may not survive a reboot unless you also keep the hostname setting in/etc/cloud/cloud.cfg(preserve_hostname: true). - Check it:
hostname -fshould print the new name.
How to check it worked
- The Overview tab shows the new name in the Hostname row.
hostname -fon the server prints the same name.- If you also want the name to resolve,
dig +short web1.example.comshould return your VPS's IP address once you've added the A record.
If it didn't work
- Save did nothing. Reload the page and check the Overview tab again. If the old name is back, try once more; if that fails, open a ticket.
- The prompt still shows the old name. Log out and back in. If it still does, run
hostnamectland check the Static hostname line. - Mail from the server is being rejected. Check that the hostname, the A record and the reverse DNS all agree.
- Still stuck? Open a ticket under Technical Support with your IP address and the name you want.